Brisket for a crowd
It seems like every woman in my extended family has her own brisket recipe. And every one of them will tell you that her recipe is the best. For the sake of family harmony, I will not attempt to disprove any of their claims, however, try my recipe and judge for yourself.
Notes:
Searing the meat:
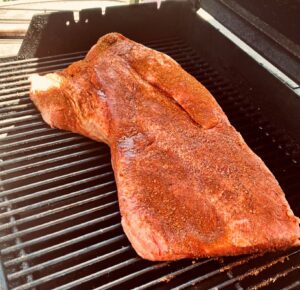
If you are making a relatively small brisket, and you have a large Dutch oven, you can sear the meat directly in the pot in which you will be cooking the meat. But if you’re making a massive piece of meat for a crowd, I will often season the meat and then sear it on my gas barbecue. It’s the only way I can manage such a massive hunk of beef. If you sear it on the BBQ, you unfortunately lose the ability to scape up browned bits left from searing in the pot, but the upside is you can feed everyone you know with one huge piece of meat. When I make this for a crowd, I use a large deep (at least 3” deep) baking dish to cook the meat. I then use thick aluminum foil instead of the Dutch oven lid to cover the meet while cooking.
Onions:
Do not skimp on the number of onions in this recipe. I know, I know – it seems like a lot. It seems like too many. And you’re going to get tired of cutting an endless mountain of onions. But onions are full of water, and all of that will cook off when you sauté them. And at the end you will be left with a succulent sauce of reduced caramelized onions that will pair perfectly with your fork tender brisket. I promise!!
Spices:
If you can get your hands on smoked salt in addition to smoked paprika, I highly recommend using them both. This is a bit of a sneaky cheater move to get that smoked flavor without actually having to fuss around with a smoker. I like a little spicy kick to my meat, and so I add some red pepper flakes and some Cayenne pepper. You can adjust the heat according to your preference if you prefer more or less heat.
Bake the meat, let cool, slice, then bake some more:
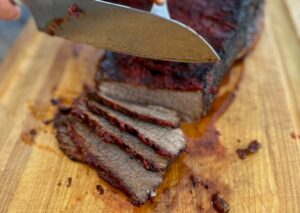
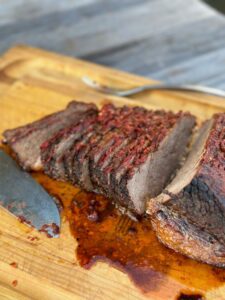
The trick to getting thin, even cut slices of meat that are fork tender is first partially baking the brisket, then letting it cool before slicing. When it’s cool it is much easier to slice the meat. After the meat has been thinly sliced and arranged in the baking dish, add the reduced baking sauce and complete baking the meat until it is fork tender and irresistible.
The barbecue sauce:
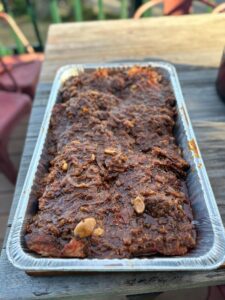
All those onions that you sliced and sautéed early in the cooking will be reduced into the most delicious barbecue sauce ever. After the initial baking of the brisket, when you remove it from the pot you will be left with an onion slurry. Place over low to medium heat, add the canned tomatoes and reduce to a thick sauce stirring intermittently to make sure it doesn’t burn. Once your meat has been sliced and rearranged in your baking dish, pour this reduced sauce over the meat, cover and finish baking.
Ingredients
Method
- Preheat the oven to 350° F
- Mix the spice rub ingredients together and reserve about 4 tablespoons on the side for baking. Next, place the brisket on a flat surface such as a baking sheet and coat both sides of the brisket evenly with the spice rub.
- Place the Dutch oven over medium heat. Heat the quarter cup oil in the bottom of the pot. Place the seasoned brisket in the hot pan and seer both flat sides. This should take anywhere from 5-10 minutes depending upon the temperature of the meat when starting (if the brisket comes straight from the refrigerator, it might take a little bit longer for adequate searing to occur). Once both sides are adequately browned, remove the brisket from the pan and set aside. A rimmed baking sheet will work well for this so any juices that accumulate can be collected and added to the Dutch oven during baking.
- NOTE: if you’re making a massive brisket for a crowd, I recommend searing it on your barbecue on both sides instead of trying to fit it in a Dutch oven. Although you will miss the brown bits at the bottom of the pan when you go to caramelize the onions in the next step, it will still make a delicious finished product.

- Next, add the onions to the pot you used to seer the meat, add 1 tablespoon salt, and 1/2 cup brown sugar, stirring vigorously to scrape up the brown bits stuck on the bottom of the pot. Continue to stir intermittently to avoid sticking and burning of the onions on the bottom of the pan. If the mixture seems dry, add 1/4 cup or 1/2 cup water to keep the onions from sticking to the bottom of the pot. This can also help with scraping up the browned bits left behind after searing the meat.
- Continue to cook the onions stirring intermittently until they reach a deep golden color (we are trying to caramelize the onions here). Once caramelized, stir the whole garlic cloves into the onions and arrange the onions in a flat layer in the pan.
- Next, lay the brisket on top of the carmelized onions, fat side up. Smear the top of the meat with tomato paste and the reserved spice rub.
- Add about 1-2 cups water to the pan and either place the Dutch oven lid on top, or cover tightly with foil if you’re using a baking dish.
- Bake at 350°F for 2-3 hours. The cooking time depends on the thickness of your meat. The thicker the meat, the longer it will need to cook.
- At this point your meat should be cooked through, but still firm when poked with a fork (or your finger, which is what I prefer as a testing instrument).
- Carefully place the meat on a cutting board, and allow to cool a little before slicing.
- While your meat is cooling a bit, you can make the final brisket sauce.
- Add 1/2 cup brown sugar and one can diced tomatoes to the sauce. Simmer the sauce on medium heat until it’s reduced and thick enough to coat the back of a spoon. You’re essentially making a barbecue sauce here. Taste as you go and tweak as you see fit. Needs more sweet? Add a touch more sugar. Needs acid? Try a little cider vinegar. Need salt- you know what to do!
- If you’re cooking your meat in a Dutch oven, you can simply prepare the sauce in the pot. However, if you’re making the brisket in a large baking dish, I recommend pouring all of the sauce ingredients into a large sauce pan before placing over the stove.
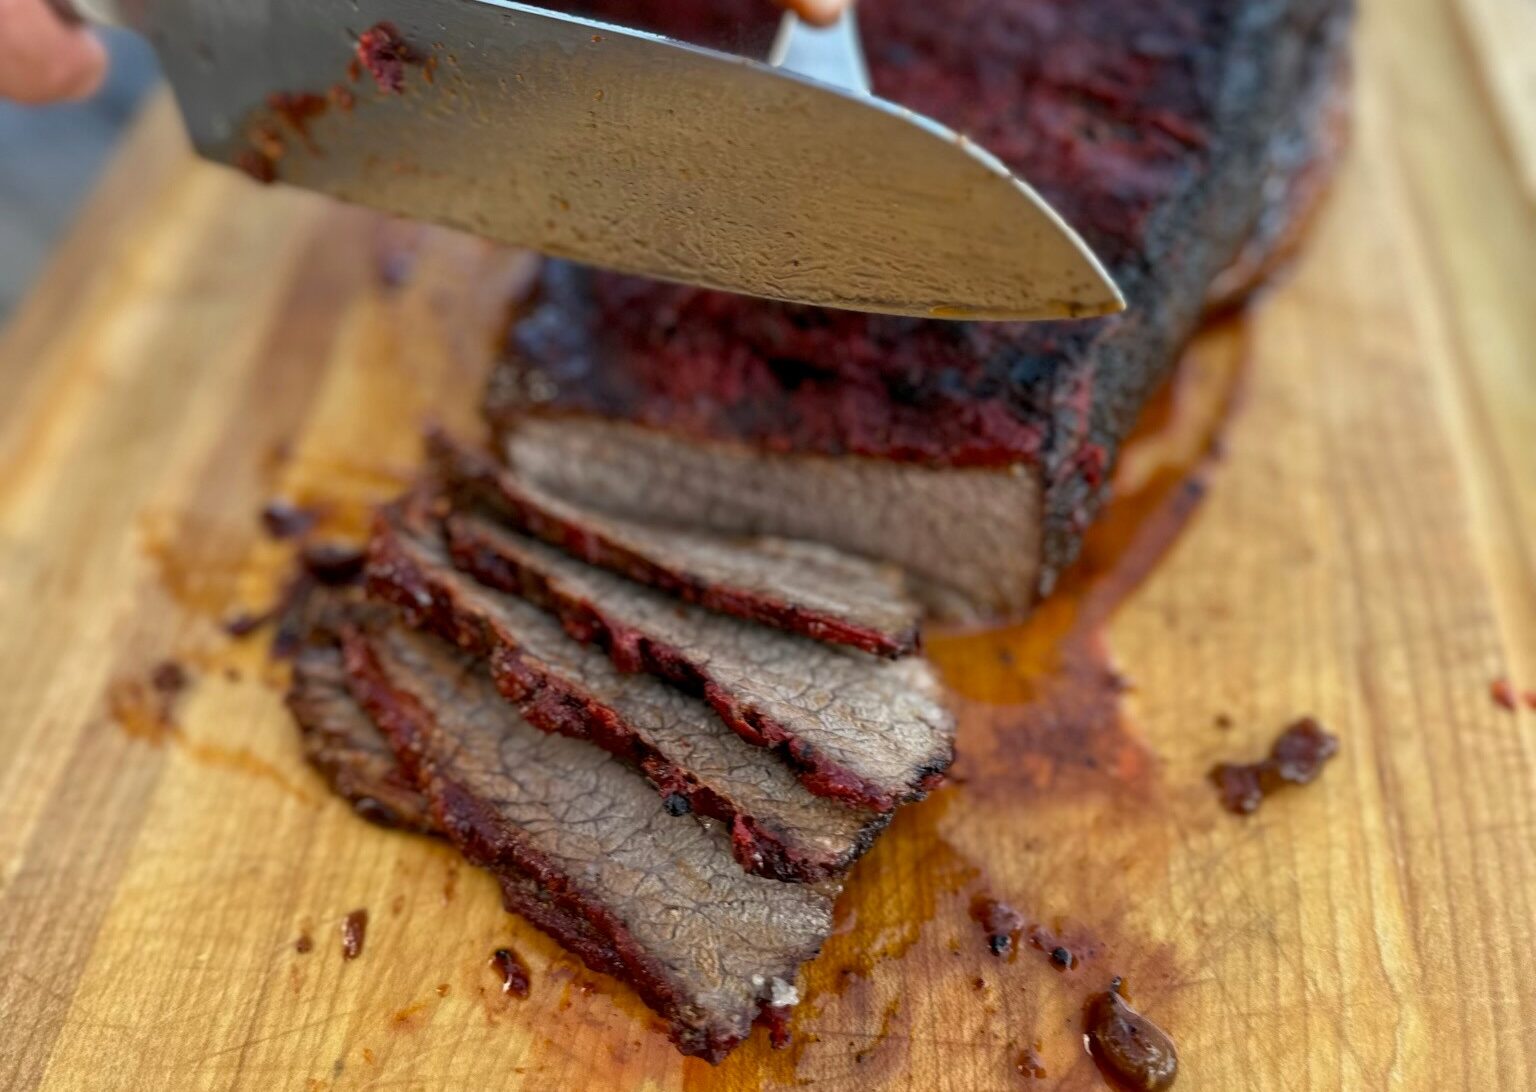
- Once the meat is cool enough to handle, slice thinly across the grain (it’s really important that it’s across the grain or you’ll end up with a stringy mess!!).
- Make the slices about 1/4 inch in thickness. You want them thin enough that once cooked, you can cut through the meat with a fork. That way you will ensure the sauce coats the cut sides of the meat.
- Arrange the meat in the cooking pan so the slices are slightly fanned
- Pour the sauce over the meat. If you have extra sauce, reserve to serve on the side.
- Place back in the oven at 350°F, cover with foil, and let cook about one more hour. Check to see if the meat is tender enough to cut with a fork, if not, continue to cook until fork tender. Enjoy!!